Tuesday, 29 March 2016

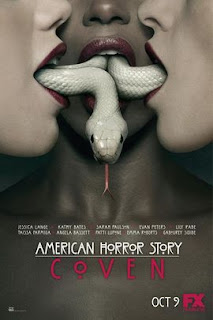
American Horror Story: Conven Characters

American Horror Story: Coven

Characters


Main Characters:

Women in Horror films/Tv are seen as the scared and the victimized, but not in this show. It shows strong female characters.

Cordelia Foxx- The Headmistress of the witch school, she is the daughter of the former supreme, is skilled in potion craft. Cordelia has blonde hair and light eyes. She has a gentle and caring soul.

Zoe Benson- Has the girl next door look, she is very nervous about the powers she has and has a negative look on her gifts.

Kyle Spencer- Good looking and caring boy until his death in a bus crash, he was pieced back together and brought back to life by Zoe and Madison. He now acts like a robot not knowing what how to control himself.

Madison Montgomery- Former star she always gets what she wants but in her new school she is treated equally. Madison came to the school when she found out she had special powers.


Refrences

https://thetelevixen.wordpress.com/2011/11/28/female-archetypes-of-american-horror-story/
http://americanhorrorstory.wikia.com/wiki/Category:Coven_(story)/Characters


Tuesday, 22 March 2016

American Horror Story Audience

American Horror Story Audience


'American Horror Story: Coven broke ratings records for the FX drama. “Coven” 
“Coven” had 3.87 million adults in the 18-49 demo — a 3.0 rating — and 2.34 million adults in the 18-34 demo — a 3.5 rating.' Huff Post TV

[1]

American Horror Story is becoming more and more popular with each season, is draws the audiences in with its unusual horror tails which are know to have some truth to them, they indulge in the freaky and weird world.

References:
http://www.huffingtonpost.com/2013/10/10/american-horror-story-coven-ratings_n_4079168.html

[1https://www.reddit.com/r/AmericanHorrorStory/comments/2mfanf/

Monday, 21 March 2016

American Horror Story: Conven

American Horror Story: Conven


"American Horror Story: Coven lacks any significant or meaningful deaths, marring any true sense of horror or foreboding that previous seasons have utilised to a far greater extent".
Season 3 isn't as horrified as the other seasons, this season has deaths but its nothing if they get brought back to life comparing to the other horrific scenes in different seasons.
" Interestingly enough, the show, which debuted in early October on FX, ranked highest of all FX series premiers in women ages 18-49." Other than it being less of a horror, I really enjoyed this season having most of the main characters women who had power. It is really different to women being seen in horror. I think this is why this season was appealing to a lot of women.


This season has some historically significance which is an interesting fact I learnt, one of the characters Madam LaLaurie is based on a really socialite/serial killer from 1834, this season shows the character as a racist and looking for immortality and she gets what she is given but its all not what she expects.

This is my favourite season as the women are shown as strong main roles in this horror series where normally it would be the women scared and frightened. It has gave me some interesting ideas for my final looks and I can't wait to start.


http://americanhorrorstory.wikia.com/wiki/Category:Coven_(story)

Oisin Vink, Dublin Homestead, summer 2014 The Irish Journal of Gothic and Horror Studies 14 (Summer 2015). American Horror Story: Coven (FX 2013) pg 146-149

https://thetelevixen.wordpress.com/2011/11/28/female-archetypes-of-american-horror-story/

Sunday, 20 March 2016

American Horror Story


American Horror Story

So if you have seen American Horror Story then you will know it is know for its weird/strange twists and stories. It dives into gruesome scenes and it is not afraid to get a little creepy and make your skin crawl so if you haven't seen it expect the unexpected. Up to now they have Five seasons and are expecting another season soon. In order of seasons it starts with:

Season 1: Murder House (2011)


This season is about a family (The Harmons) who face strange goings on in  their new home: The farther character Ben Harmon has been caught cheating on his wife and has a big fall out with his wife Viven and daughter Violet. Their are strange happenings with the neighbours, one of Dr Harmon's patients. A lot of mysterious visitors to their haunted home. The house seems the have a history, from brutal murders to demonic manifestations.


Season 2: Asylum (2012-13)


This season is set around and sanitarium, run by ministers of faith and science. It shows the characters running from their own past wether they are innocent or the mad. It features aliens, nazis, possessed nuns, serial killers and demented doctors.


Season 3: Conven (2013-14)


This season is based on the secret history of witches and witchcraft in America. The witches that have survived and managed to escape the Salem witch trials, are now facing extinction. Mysterious attacks have have been happening to their kind and now have a special school where they send young witches and learn how to protect themselves.


Season 4: Freak show (2014-2015)


Freak show is set in the year 1952 in Jupiter, Florida. A circus of human curiosities have arrived in town, with a strange dark entity which threaten the towns people and freaks. This is a story of the freak performers and their desperate journey of survival.


Season 5: Hotel (2015-2016)


Hotel is based in Los Angeles, Hotel Cortez. The story follows Elizabeth, who is the owner of the hotel, she tries to protect herself and her children from her past lover who wants to seek revenge on her. John Lowe who is a Los angeles homicide detective has been lead to her hotel from a series of grisly murders that has been going on.


They all have their unique plot twists and graphic scenes and some have been based on true stories but have been manipulated. It uses the same actors/actresses in and out of different seasons of the show and it always has a new story each season which is what appeals to the audience as you never know what the seasons are going to be about and whats will be happening, there is always a different surprise to await you.


http://americanhorrorstory.wikia.com/wiki/Category:Asylum_(story)

http://www.hollywoodreporter.com/live-feed/american-horror-story-asylum-finale-spoilers-ryan-murphy-414990

http://americanhorrorstory.wikia.com/wiki/Category:Coven_(story)

Thursday, 17 March 2016

Moulded wounds

Moulded Wounds

Products used:
Petroleise (Mould release spray)
Pros-aid glue
progleam
prosthetic mould
kryolan cream paint
fake blood
wound filler
cotton buds
witch hazel
scissors


Name: Sian Harding-Morris
Age:18
Hair type: Dyed
Skin type: Normal
Skin tone: Olive/slight tan
Eye colour: Hazel
Allergies: None
Contraindication: None
Notes: Make sure the model is not allergic to latex, use progleam to take off the prosthetic mould.


Step 1. Make sure the area you are lacing the mould is clear of product
Step 2. Using the scissors cut around the would  in a wiggly cut, leaving a little edge 
Step 3.Using a baby bud apply the glue onto the prosthetic and onto the area you are placing the wound.
Step 4. When glue dries clear press on the mould firmly
Step 4.Using the witch hazel blend down the edges of the wound in and across and outwards motion, until you have melted down the edges.
 Step 5.Powder over the wound and see what you need to colour the wound with


Step 6. Using the cream black paint fill the inner slice of the wound and fill with wound filler
Step 7. Add fake blood onto the wound and slightly around 


This is one of my best special effects work, I really enjoyed creating this an would like to go onto creating the moulds myself. If I would improve anything it would be to blend the edges more with witch hazel, to make it more realistic.

Wednesday, 16 March 2016

American Horror story styled hair

American Horror Story Styled Hair

Today I have concentrated on creating an American Horror Hair style, doing Moira of the first season of the show. Her hair is nicely styled, curled and pinned.

Tools needed: Heated Rollers, sectioning comb, brush, grips, sectioning clips and hairspray


[1]


Step 1
Brush all of the hair making sure you are getting rid of any tangles
Step 2
Create a neat side parting at the front of the hair
Step 3
Starting at the front use the larger size of the  heated rollers, starting from the parting and applying  the heated rollers side ways on the shorter side, making sure the roller goes under the hair and is tight enough and a reasonable amount of section into the roller. (3 red rollers fitted on this side)
Step 4
Apply the rollers on the other side of the parting in the same way (5 red rollers fitted here)
Step 5
Now use the medium size heated rollers, behind the bigger ones and apply them facing forward, and in a brick work set. Do this until half way down the head. (6 blue rollers fitted here)
Step 6
Now use the small size heated rollers, making sure the roller goes over the hair and curls.( 7 white rollers fitted here)

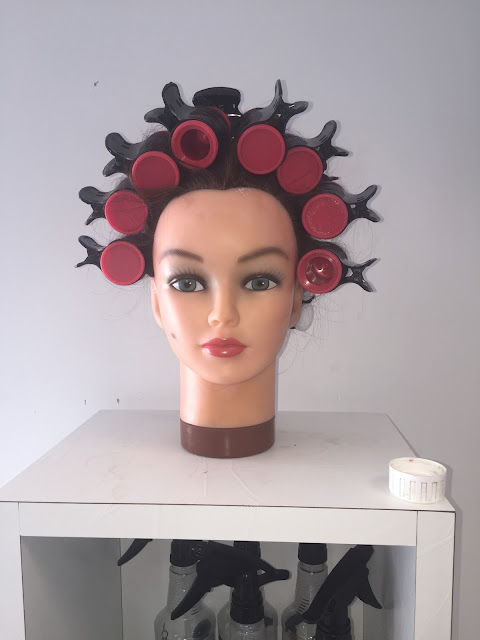
Pictures of the heated rollers layout are below
Step by Step continues after the images
Back view


Side view

Front view

Side view

Top view

LEAVE ROLLERS IS FOR A WHILE (10-15 MINS)

Image of what the hair looks like after taking the rollers out


Step 7
Section the front of the hair off and clip it away
Step 8
Using the bottom of the hair start to curl it under and round, do it separately into 3 big rolls and firmly grip. Start gathering them together with the pointy end of the comb and pin them together so there are no gaps
Step 9
Now using the front section, keep the side parting, start creating curled textures into the hair and firmly pin them.
Step 10
Use Hairspray all over the hair and smooth the wispy hair down.

Images of end finish 

Back view

Side view

Front view

Back/side view

Back/side view

I'm not really that confident with doing hair, but I think I am getting more confident and better at styling the hair. Creating different hairstyles and learning new skills on this course is showing and helping with different techniques. I enjoyed today doing this hairstyle and think I could re-create it and do it better. I need to improve on hiding the grips, they are all hidden in this hairstyle but that's after me finishing the style and then spending time going over and re-inserting them to hid them.


References:
[1] American Horror Story, 2011. Murder House Moria  [digital image] [16/03/16]. Available from: URL Filename including extension
American Horror Story- Murder House, 2011 [medium]. Netflix

Wednesday, 9 March 2016

Continuity Assessment


Continuity Assessment

Consultation notes:
Name: Ross Kershaw
Age:22
Skin type: dry
Hair type: Grey, short
Skin tone: Pale
Eye colour: blue
Eyeshape: Even
Allergies/medication: N/A
Contraindications: N/A

Tools used:
Illamasqua Satin & Matte Primers
Kryolan Foundation Palette
Kryolan Old Age Wheel
Kryolan Translucent powder
Illamasqua Eye-shadow Justify
Mehron Neutral Eye-shadow palette
Kryolan Color spray Grey
Kryolan Color spray Black
Illamasqua 001 foundation
Kryolan Bruise Wheel
Kryolan Cream Paint palette
Illamasqua eyeliner gel
Kryolan Red eye drops


Hair:

Step 1
Using a tail comb section the hair in a side part on the left side of the head.
Step 2
Use Hairspray and slick back the left section of the hair.
Step 3
Using curling tongs curl the ends of the hair on the right side of the parting
Step 4
After curling the ends back comb the right side to make it look messy, and use hairspray
Step 5
Using the Grey color spray, spray onto the left side of the hair making sure you cover the face to no product gets onto the face. Getting all the hair and start to bring the spray over the parting slightly and to the centre of the head.
Step 6
Using the black color spray, spray the right side of the hair at the ends of the curls and towards the centre of the head. Make sure to cover the face.
Step 7
If any of the spray got onto the face/ neck or ears wipe away.

Jekyll Make-up

(LEFT SIDE ONLY)
Step 1
Cleanse, tone and moisturise the face
Step 2
Apply Illamasqua matte primer
Step 3
Using Kryolan palette (Ivory & Alabaster) onto the highlighting parts of the face e.g cheekbones, centre of forehead, down nose and along jawline.Then Blend
Step 4
Using Kryolan Old age wheel, use the lightest brown and contour the face e.g under cheekbones, under jawline, down side of nose and on temple
Step 5
Using Kryolan translucent powder, powder the make-up side of the face
Step 6
Using Illamasqua Justify Eyeshadow, use this to apply and blend into the contours of the face
Step 7
Apply the same shadow on to the eyelid diagonally form the top left corner to the bottom right of the eye lid, this will create a droopy eyelid effect
Step 8
Using the same shadow create wrinkles with a think line brush, crows feet, fore head lines, mouth lines and under the chin
Step 9
Using the Mehron neutral palette and the brown from it, make the wrinkle lines deeper.
Step 10
Using a clean brush blend the lines slightly so they are a bit faded
Step 11
Using the grey color spray, spary onto a clean mascara wand and apply to the left eyebrow making sure your are getting most of the hairs and not getting the product onto the skin.

Hyde Make-up

(RIGHT SIDE ONLY)
Step 1
Apply Illamasqua Satin primer 
Step 2
Use Illamasqua 001 and Kryolan Ivory foundation onto the face
Step 3
Using Kryolan translucent powder, set the face
Step 4
Using Kryolan bruise wheel, apply the purple onto the eyelid and under, and blend 
Use the yellow and blend onto the under eye area to create discoloured bags under the eyes
Use the purple again and apply to the inner corner of the eye
Step 5
Using Illamasqua Justify eye-shadow, contour deep onto the cheek bones and take it down and round in line with the lip, also blend onto the chin and down side of nose
Step 6
Using the kryolan eye-shadow palette, use the grey and deepen the contour
Step 7
Using the black color spray, apply onto a mascara wand and brush through the right eyebrow
Step 8
Apply some grey eye-shadow onto the lip
Step 9
Add some gel eye liner on to the water line and smudge out
Step 10
Add kryolan red eye drops, use a tissue under the eye to catch any drips.


I am really happy with the outcome of the make-up, but I am nervous in have to re create it, I have all my notes and have took loads of close up images to create things like the wrinkles and the hair. I really enjoyed working with Ross he is a good model and perfect for my character, I liked creating this make-up as more of a dramatic theatre look. I disliked using the spray, its a really good product but messy and hard to get it into the place you want with out it going onto the skin, I hadn't realised that Ross couldn't take his ear piercings out so I thought this has ruined the old age overall look, but their is nothing anyone could have done at the time, I should have got a different model but I realised last minute and Ross was still perfect for my character. I had a slip up when applying the black color spray to the eyebrows as it smudged onto the skin slightly, but I just wiped it away and corrected the foundation above the brow. I have learned so much about continuity that I didn't know about before, it is always good to take loads of pictures of the make-up to refer back to and writing down notes. Keeping make-up more simplistic but still effective is a good thing for continuity, I mostly need to work on making my make-ups more simple and not going to theatrical with them and making them look more realistic.


I was so nervous recreating this make-up, especially the hair. I enjoyed doing the make-up as always but trying to get it the exact same was tricky, especially the wrinkles. I disliked doing the hair again as it was hard getting it in the same structure and shape, you can tell in the pictures that the hair is not that similar but it doesn't seem as noticeable to people I have shown.I had the exact same problem as the first make-up with getting the black color spray on the skin above the eyebrow, but I corrected it in the same way (by accident and not continuity purpose). I have learned it is hard to create the same make-up when its as dramatic as mine, what I have said before about keeping it simple but effective is what I will keep in mind for next time I do continuity make-up as if its not the same it would effect the look on screen.

Saturday, 5 March 2016

Latex Burns

Latex Burns 

Consultation notes:
Name: Amy Size
Age:22
Skin type: dry
Hair type: Dyed
Skin tone: Pale
Eye colour: blue
Eyeshape: Even
Allergies/medication: N/A
Contraindications: N/A
Notes: Do allergy test with latex before use. Take off with care. 

Tools used:
Latex
Tissue
Kryolan cream paint (red, black, dark red)
Black stipple sponge
Kryolan barrier
Hair dryer
Fake blood


Step 1: Make sure the area you are using is clean and has no products on before and apply Kryolan barrier mouse.
Step 2: Rip tissue up and stick it to the arm using the latex 
Step 3: make sure all the area you want is covered
Step 4: dry with cool hair dryer
Step 5: When all dry use the red paints and clean stipple sponge to dab onto the latex tissue
Step 6: Then Apply some black to the burn and also dab some fake blood on top.


Friday, 4 March 2016

Practice of Hyde on ross

Practice of Hyde make-up on Ross

Consultation notes:
Name: Ross Kershaw
Age:22
Skin type: dry
Hair type: Grey, short
Skin tone: Pale
Eye colour: blue
Eyeshape: Even
Allergies/medication: N/A
Contraindications: N/A

Tools used:
Illamasqua Satin primer
Kryolan Foundation Palette
Kryolan Translucent powder
Illamasqua Eye-shadow Justify
Kryolan eyeshadow palette
Illamasqua 001 foundation
Kryolan Cream Paint palette
Kryolan Red eye drops

Hyde Make-up

(RIGHT SIDE ONLY)
Step 1
Apply Illamasqua Satin primer 
Step 2
Use Illamasqua 001 and Kryolan Ivory foundation onto the face
Step 3
Using Kryolan translucent powder, set the face
Step 4
Using Kryolan eyeshadow palette, blend grey under eye to create bags under eyes
Step 5
Using Illamasqua Justify eye-shadow, contour deep onto the cheek bones and take it down and round in line with the lip, also blend onto the chin and down side of nose
Step 6
Using the kryolan eye-shadow palette, use the grey and deepen the contour
Step 7
Using the Kryolan black cream paint on to mascara wand and brush into eye brows making them bushy
Step 8
Apply some grey eye-shadow onto the lips
Step 9
Add kryolan red eye drops, use a tissue under the eye to catch any drips.


I really like this make-up but next time I will add more to the eyes, some liner and smudge it over the eye, use the kryolan bruise wheel to add some colour to the eyes, to make them look more deeper and realistic. Deepen the contour also, make the eyebrows darker. 

Thursday, 3 March 2016

Claw marks


Claw Marks


Consultation notes:
Name: Amy Size
Age:22
Skin type: dry
Hair type: Dyed
Skin tone: Pale
Eye colour: blue
Eyeshape: Even
Allergies/medication: N/A
Contraindications: N/A
Notes: Take off with care. Warm water or surgical spirit

Tools used:
Spirit gum
Scar wax
Fake blood
Kryolan cream paints (red, dark red and black)
stipple sponge
spatula

Step 1: Make sure area is clean and free from any products
Step 2: Apply spirit gum to the areas you are applying the four claw marks
Step 3: warm up the wax in your hand and roll into four different sized sausage shapes
Step 4: apply them to the spirit gum and with a spatula smooth the wax down and out making sure they are blended
Step 5: Make a line down the middle of the four wax pieces and spread them out to make them look the deep and wide claw marks
Step 6: Apply Dark red and black cream paint with brush in the inside of the claws
Step 7: Apply fake blood into the claws and stipple a little around the edges
I believe I have done really well with the scratches as this was my first go of them! They look so realistic and the blood inside them makes them look like a fresh cut and like a wolf or a big cat has created the scratches. This would be good to use these scratches if I was dong a werewolf attack for the gothic horror theme. Next time I would use more spirit gum to hold them on longer or use latex over them to seal them down. 
Leonardo Dicaprio - Revenant
I have heard so much about this film and how amazing the make-up is, I have yet to watch the film but I have done some research to see what all the fuss was about. I am speechless the make-up is amazing! Leo is playing the character Hugh Glass who is brutally attacked by a bear, while he is exploring the wilderness. Hugh's hunting team leaves him for dead and he has to fight for survival to make it home. Sian Grigg is Leo's personal make-up artist, she created the prosthetics for the film which are unreal!
[1]


Its amazing how many make-up artists where needed and the amount of time it took to apply the make-up, this is something I would like to be involved in, in the future. I want to be able to  create amazing prosthetics and be able to apply them to create an amazing look like this.

Reference:
[1] The Revenant, 2016. The Revenant makeup [digital image] [03/03/16]. Available from:http://static.independent.co.uk/s3fs-public/styles/story_large/public/thumbnails/image/2016/01/20/15/the-revenant.jpg
[2]20th Century Fox, 2016. The Revenant  | "Makeup" Featurette [HD] | 20th Century FOX [03/03/16]. Available from: https://www.youtube.com/watch?v=FM-xuNm6F0U

Tuesday, 1 March 2016

Practice of Jekyll on ross

Practice of Jekyll on Ross

Consultation notes:
Name: Ross Kershaw
Age:22
Skin type: dry
Hair type: Grey, short
Skin tone: Pale
Eye colour: blue
Eyeshape: Even
Allergies/medication: N/A
Contraindications: N/A

Tools used:
Kryolan Foundation Palette Ivory
Kryolan Old Age Wheel, Medium Brown
Kryolan Translucent powder
Illamasqua Eye-shadow Justify
Mehron Eye-shadow palette Brown


This Make-up is only applied to half of the one side of the face
Step 1: Apply Kryolan Ivory foundation to the Highlighted places (middle forehead, down the middle of nose, onto cheekbones, under eye and jawline)
Step 2. Blend out the foundation and apply the medium brown out of old age wheel to contour (down side of nose, temple, under cheek bone and under jawline)
Step 3:  Powder over the face with kryolan translucent powder
Step 4: Apply Illamasqua Justify eye shadow to the creases on the chin, onto the contour under the cheekbone, slightly onto the forehead, the crease onto the mouth, onto the eyelid diagonally from the top left inner corner down the the bottom outer corner of the eye, this creates a droopy eyelid effect.
Step 4: Ross didn't have any wrinkles so I have created them myself  (crows feet)
Step 5: Use the Brown out of the Mehron eye shadow palette and darken the wrinkles.


This look is really theatrical and would be made for the theatre, I like how dramatic it looks but it would not be good for tv/film which is what I wanted to do, I am going to stick to this look as I am using grey and black spray into the hair and think it would make the look more character like for theatre. If I was creating this look for tv/film I would have used latex to create the wrinkles, but a I know latex is unpredictable and it was a continuity make-up I felt it was better for me to create the old age like this so I have saved time and know it would be easier to recreate. I know I need to practice on my latex work as I don't think I am good as creating the old age look with it, so that is one thing I need to practice a lot of.